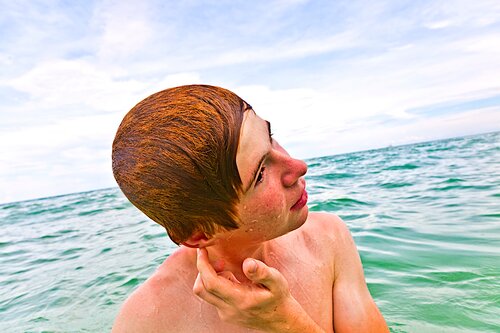
How To Remove Water From Ears

Make sure that there is water in your ears. This can easily be checked by slightly tapping your temple with your wrist. You will feel very uneasy if water is stagnant in your ear.

1. Drain the ear. Wipe your outer ear slowly and gently with a soft towel or cloth, then tilt your head to one side to help the water drain out of your ear canal.

2. To find the right angle, move your head back and forth as you tilt it. It may even help to tug on the earlobe in order to open the canal wider.

3. An alternate method is to stand on one foot and tilt your head so the offending ear faces the ground. Hop on one foot until the water drains

4. Another method is to lie down on your side with the ear facing down. Gravity may cause the ear to drain naturally.

5. Pretend you are gnawing on some food to move the jawbones around your ears. Tilt your head to the side that doesn’t have water in it, then quickly tilt your head to the other side.

6. Blow-dry the ear. Put a hair dryer on the lowest setting, hold it at least 1 foot/3 meters away from your head, and blow into the ear.

7. Alternatively, blow the warm air across opening of the ear instead of into it. Whenever warm, dry air passes over water, it pulls away water vapour.

8. Make an ear drop solution of 1 part white vinegar and 1 part rubbing alcohol. In addition to promoting drying, this will discourage infection. Drop carefully and pour 5mL into the affected ear, then drain out using the suggestions above. The acid in this mixture acts to break down the cerumen (earwax) that maybe holding in some water in the ear canal, while the alcohol dries quickly and takes the water with it. Do not do this if you have a punctured eardrum.

9. Create a vacuum in your ear. Face affected ear down and then with your palm, push in and out until water begins to come out. Don’t do this with the ear facing upwards or you may drive it farther back into the canal.

10. Alternatively, tilt your ear down, place your finger in it, and make a vacuum with your finger by pushing and pulling rapidly. In a moment the water should come out of your ear very quickly. Note that this is not the preferred method, as scratching your ear canal can cause infection.

Earwax Removal

1. Mix a solution of equal parts vinegar and alcohol. This will help soften the cerumen (wax), and make it easier to flush out. Apply the solution to your ear canal. Lean your head sideways and put a few drops of the solution in your ear. A medicine dropper makes adding a few drops to the ear an easy task. Allow the solution to settle in for about 5 minutes. To keep it from spilling out, place a piece of cotton in your ear before raising your head. If both ears need attention, repeat the process with the other ear.

2. Add oil. Drop a few drops of warm (not hot) olive oil, mineral oil or baby oil into your ear, and keep the head sideways for about five minutes. Lean your head upright and wipe away any oil and wax that exit the ear canal with a clean cloth.

How to remove with a finger

Insert either your index or little finger into your ear canal a short way. Using a downward motion, gently scrape the earwax out. Repeat three or four times. Dispose of the wax and wash your hands.

I’m Diabetic, but I want Cake!!

We all have that once in a while cravings that we just have to indulge. One might think that being diabetic means you can’t have such indulges once in a while but we are here to tell you that its not the case!

But let’s not even talk about the cravings. What happens when you want to throw a birthday bash and you as the Celebrant must and should taste your Celebratory cake even though you’re diabetic?

The major ingredient in cake to avoid as a diabetic is Sugar. Remove Sugar, replace with another sweetener and Voila! You have a sumptuous and delicious cake.

A traditional cake recipe uses a combination of all-purpose flour, sugar, and egg with a frosting whipped up with butter and sugar. Most of these ingredients are sources of refined carbohydrates that, in large quantities, can drastically increase blood sugar level. When preparing a diabetes friendly cake, you will focus on tweaking those very ingredients.

The key to keeping diabetes under control is not avoiding particular foods, but keeping blood sugar at acceptable levels. The guidelines stress that regular exercise is key to achieving this goal for most diabetics.

A type of Cake which can be taken by not just Diabetics but even people that don’t like very sweet foods is the CHOCOLATE MOCHA CAKE.

RECIPE

  • 1/3-cup flaxseed meal.
  • 3-cups almond flour.
  • 1-cup unsweetened applesauce.
  • 2-teaspoons vanilla extract.
  • 1-shot espresso or strong brewed coffee.
  • 1-cup unsweetened organic cocoa powder.
  • 1-cup hot water.
  • 1-cup light olive oil.
  • half-cup Truvia.
  • 1-2-cup organic coconut, grated.
  • 1-tablespoon baking powder.
  • 2-teaspoons baking soda.
  • 1-jar sugar-free chocolate frosting.
  • half-teaspoon xanthan gum.
  • 1-teaspoon crushed Himalayan pink salt.

METHOD

Preheat oven to 375F. Grease the inside of a cake tin, line with wax paper and lightly grease the paper with grass-fed butter. Take a medium-size mixing bowl and whisk together the applesauce, cocoa powder, Truvia, coconut, and add the coffee with the hot water. Mix until well-blended and set aside. In a separate bowl whisk together the flax meal, flours, baking powder, baking soda, xanthan, and salt blend well. Add the contents of the two bowls together and whisk until smooth. Pour the batter into the cake tin and add to the oven. Bake for 30-minutes until a skewer passes cleanly through the center of the cake. Remove from the oven and let cool. Frost with sugar-free buttercream frosting.

ENJOY YOUR SWEETS AND BE HEALTHY AT THE SAME TIME!!

Life is good, fruits makes it better.

Nature is a whole lot of blessings when you look at what we’re endowed with as humans or creatures of a process of existentialism. Engaging in daily activities can be tasking, from stress of the daily activities that determines our survival, exposure to fumes, second hand smokes, pollution of various types, inhalation of pollens of different sources that actually pose a great risk on our health from time to time. The result of which is cumulative stress to a body made of cells, fibers, muscles, ligaments, tissues, cartilages, mucus membranes, electrolytes and various chemical compositions which a foreign object might alter its chemistry in the long run.

But endowed with nature, antioxidants which can be derived from fruits and other sources of food exists to solve a lot of deficiencies of the body, ingesting the right quantity do so much good to our body than we can ever imagine. Hoping to change your mind about fruits this day, while trying to urge you to take consumption of fruits seriously for a greater health, smoothie should be a thing to consider. It’s a thick and creamy beverage, but most times, we often belittle the power of vitamins, little do we know the revival effect of anti-oxidants on the cell and body system. Made from pureed raw fruit, vegetables, and sometimes dairy products, Smoothies may be made using other ingredients, such as water, crushed ice, fruit juice, sweeteners (e.g. honey, sugar, stevia, or syrup), whey powder, plant milk, nuts, nut butter, seeds, tea, chocolate, herbal supplements, or nutritional supplements. A smoothie containing dairy products is similar to a milkshake, though the latter typically contains less fruit and often uses ice cream or frozen yogurt. Delivering an entire package of nourishment to the body, smoothie is always of choice when it comes to dietary Supplementations.

Never miss out again, a nutritious blend is all it takes!

Carotene For Days

It’s known as carota in Latin, the very red orange pigment found in plant and fruits has got to be a very sonorous title for a legume. Being converted to vitamin A in the body, it serves as goodness for the cells. Some evidence suggests that beta carotene might slow cognitive decline, how else can we hope for a better mental function?

Giving vegetables and fruits their rich colors, Carotene remains the red/yellow-orange pigment in plants. H. Wachenroder crystallized beta carotene from carrot roots in 1831, and came up with the name “carotene”. beta carotene is a precursor of vitamin A. We need vitamin A for healthy skin and mucus membranes, for a better immune system, and good eye health and vision.

Vitamin A can be sourced from the food we eat, through beta carotene, for example, or in supplement form. The advantage of dietary beta carotene is that the body only converts as much as it needs. Beta carotene in itself is not an essential nutrient, but vitamin A is. Like all carotenoids, Beta carotene is an antioxidant, a substance that inhibits the oxidation of other molecules; it protects the body from free radicals.

Free radicals damage cells through oxidation. Eventually, the damage caused by free radicals can cause several chronic illnesses. Several studies have shown that antioxidants through diet help people’s immune systems, protect against free radicals, and lower the risk of developing cancer and heart disease.

Some studies have suggested that those who consume at least four daily servings of beta carotene rich fruits and/or vegetables have a lower risk of developing cancer or heart disease. Carotene can be gotten from various sources of which Carrot is one and the major source of carotene, other sources of beta-carotene includes sweet potatoes, dark leafy greens, such as kale and spinach, romaine lettuce, squash, cantaloupe, red and yellow peppers, apricots, peas, broccoli ?. Let’s take a journey on down the lane with beta carotene today, for a healthy skin, vision, immunity and better health. It’ll be worth it.

Yummy Cookies!!

INGREDIENTS

1 1/2 c. all-purpose flour

1/4 tsp. kosher salt

1/4 tsp. baking soda

1/4 tsp. ground cinnamon

5 tbsp. butter, softened

1/2 c. granulated sugar

1/2 c. packed brown sugar

1 large egg

1/4 c. plain Greek yogurt

1 tsp. vanilla extract

1 c. shredded zuccini

1 c. semi-sweet chocolate chips

1 c. old-fashioned oats

DIRECTIONS

FOR OVEN

  1. Preheat oven to 350°. In a small bowl, whisk together flour, salt, baking soda and cinnamon.
  2. In a large bowl, beat together sugars and butter until light and fluffy. Add egg, yogurt, and vanilla and mix until evenly combined. Mix in flour mixture until just combined. Fold in oats, chocolate chips, and zucchini. Drop by rounded teaspoon 2 inches apart on baking sheets.
  3. Bake for 15 minutes. Let cool for 2 minutes on baking sheet and transfer to wire rack to cool completely. Note: Cookies will spread a bit, but not take on much color.

FOR AIR FRYER

  1. In a small bowl, whisk together flour, salt, baking soda and cinnamon.
  2. In a large bowl, beat together sugars and butter until light and fluffy. Add egg, yogurt, and vanilla and mix until evenly combined. Mix in flour mixture until just combined. Fold in oats, chocolate chips, and zucchini.
  3. Line air fryer basket with parchment paper. Working in batches, use a small cookie scoop to scoop dough and place on parchment paper at least 1” apart.
  4. Cook at 350° for 10 minutes! Remove cookies and let cool on a wire rack, and repeat with remaining dough. Note: Cookies will not spread much, but will get golden brown.

Berry Basil Lemonade Sorbet

INGREDIENTS

1 c. sugar

1 c. lightly packed fresh basil

6 c. frozen mixed berries

3/4 c. lemon juice (from about 4 lemons)

This ingredient shopping module is created and maintained by a third party, and imported onto this page. You may be able to find more information about this and similar content on their web site.

Directions

1. In medium saucepan, combine sugar and 1 cup water. Heat on high until sugar dissolves, stirring occasionally. Add basil. Remove from heat, cover and let stand 15 minutes. Strain syrup into medium bowl, discarding basil. Refrigerate until cold.

2. In blender, puree frozen berries, lemon juice and cooled basil syrup until smooth. Transfer to metal 8-inch square baking pan. Cover with plastic wrap and freeze only until firm enough to scoop (about 2 hours). If sorbet is too hard to scoop, let stand at room temperature until slightly thawed.

Vegan Pancake

INGREDIENTS

1 c. all-purpose flour

1 tbsp. granulated sugar

1 tbsp. baking powder

1/4 tsp. salt

1 c. almond milk (or any other non-dairy milk)

2 tbsp. coconut oil

Vegetable or coconut oil, for frying

Maple syrup, for serving

Fresh fruit, for serving (optional)

DIRECTIONS

1. In a large bowl, whisk together flour, sugar, baking powder, and salt. Add  almond milk and coconut oil and mix until smooth.

2. In a large skillet over medium low heat, heat oil. Using a 1/4 cup measure, pour batter into pan. Cook 2 to 3 minutes, and flip when you see bubbles forming around the edges of the pancakes. Cook 2 to 3 minutes more on the opposite side, until golden. (If making a large batch, preheat oven to 200° and place prepared pancakes on baking sheet in oven.)

3. When all batter has been used, serve with maple syrup and toppings of your choice.

Time For Some Keto-friendly Low Carb Pancakes!!

INGREDIENTS

1 c. all-purpose flour

1 tbsp. granulated sugar

1 tbsp. baking powder

1/4 tsp. salt

1 c. almond milk (or any other non-dairy milk)

2 tbsp. coconut oil

Vegetable or coconut oil, for frying

Maple syrup, for serving

Fresh fruit, for serving (optional)

DIRECTIONS

1. In a large bowl, whisk together flour, sugar, baking powder, and salt. Add  almond milk and coconut oil and mix until smooth.

2. In a large skillet over medium low heat, heat oil. Using a 1/4 cup measure, pour batter into pan. Cook 2 to 3 minutes, and flip when you see bubbles forming around the edges of the pancakes. Cook 2 to 3 minutes more on the opposite side, until golden. (If making a large batch, preheat oven to 200° and place prepared pancakes on baking sheet in oven.

3. When all batter has been used, serve with maple syrup and toppings of your choice.

Honey! Honey!! Honey!!!

Raw honey has been used for a long time and has a variety of health benefits and medical uses. It’s even used in some hospitals as a treatment for wounds. Many of these health benefits are specific to raw, or unpasteurized, honey.

Most of the honey you find in stores is pasteurized. The high heat kills unwanted yeast, can improve the color and texture, removes any crystallization, and extends the shelf life. Many of the beneficial nutrients are also destroyed in the process.

Here are some of its great benefits!

1. Contains Antioxidants. Antioxidants help to protect your body from cell damage due to free radicals. Free radicals contribute to the aging process and may also contribute to the development of chronic diseases such as cancer and heart disease. Research shows that antioxidant compounds in honey called polyphenols may play a role in preventing heart disease.

2. Has Antibacterial and Anti-fungal properties. It naturally contains hydrogen peroxide, an antiseptic. It’s effectiveness as an antibacterial or anti-fungal varies depending on the honey, but it’s clearly more than a folk remedy for these kinds of infection.

3. Heals wounds. Manuka honey is used in medical settings to treat wounds because it’s been found to be an effective germ killer and also aids in tissue regeneration. Studies show that Manuka honey can boost healing time and reduce infection. Keep in mind that the honey used in hospital settings is medical grade, meaning it’s inspected and sterile. It’s not a good idea to treat cuts with honey you buy from a store.

4. Aids in Digestive problems. Honey is sometimes used to treat digestive issues such as diarrhea, though there isn’t much research to show that it works. It’ s proven to be effective as a treatment for Helicobacter pylori (H. pylori) bacteria, though, a common cause of stomach ulcers. It’s also a potent prebiotic, meaning it nourishes the good bacteria that live in the intestines, which are crucial not only for digestion but overall health.

5. Moisturises the skin. When applied to the skin, honey increases circulation which encourages a natural, healthy radiance. Honey is a humectant which helps your skin absorb and retain moisture which keeps it from drying out. Honey is packed with natural antioxidants and anti-microbial properties which help protect, repair and prevent skin damage. Honey is also quite calming to the skin. As an anti-irritant, products containing honey are beneficial for sensitive skin and even baby products.

Add to cart